侧栏添加icon
我使用的是Font Awesome的icon,首先在主页点击"Get Start"注册一个账号来获得你的kits,在layouts\partials\head.html里引入这个kits。

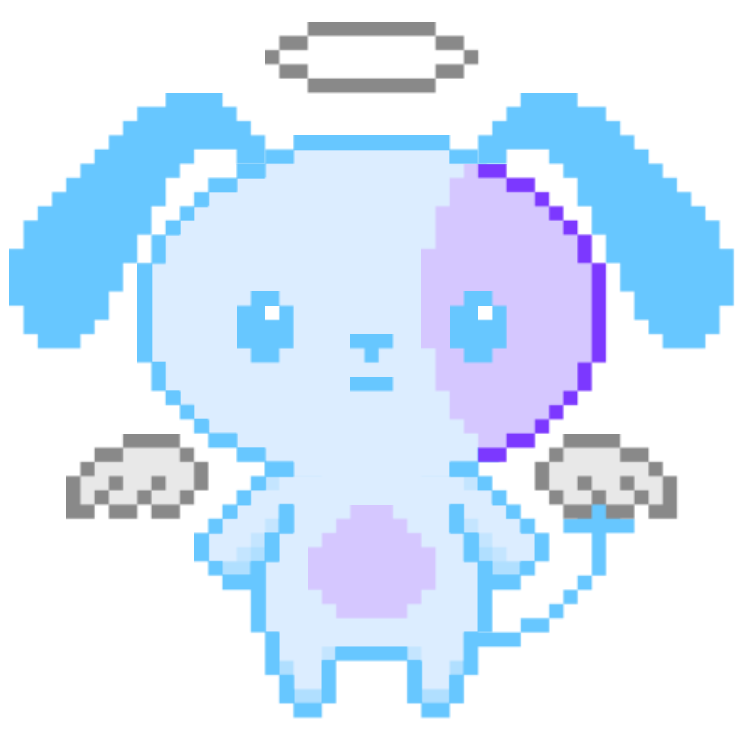
之后你就可以在博客的任何地方渲染它们freetag下的免费icon了,比如一只小狗。剩下的似乎都需要购买和额外设置,但我个人觉得免费区的就足够使用了!
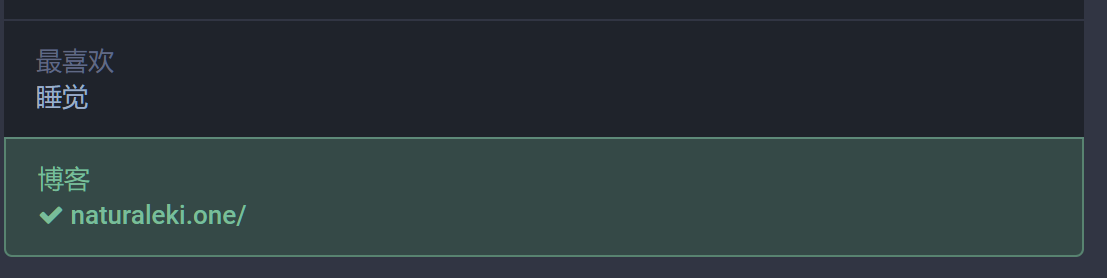
题外话,直到修改博客侧栏时我才发现我的主题网页端和手机端的侧栏是放在两个不同的html文件里的,不过只是添加icon的话修改方法倒是完全一致。顺便把毛象验证自己是个人资料元数据中的某个链接的所有者的rel="me"属性链接也整了一下,于是我的毛象个人资料上的博客网址旁就多了一个小小的认证图标,还挺酷的!
博客顶部字体修改
中文部分使用了IPix中文像素字体,英文部分则是开源的方舟像素字体。
把字体文件下载到static\fonts路径下,在自定义css里引入字体并设置。
@font-face {
    font-family: "ipx";
    font-style: normal;
    src: url("/fonts/ipx.ttf") format("truetype");
}


@font-face {
    font-family: "ipx en";
    font-style: normal;
    src: url("/fonts/ark-pixel-10px-monospaced-zh_cn.ttf") format("truetype");
}

header .title-main {
    font-family: "ipx","Product Sans",sans-serif !important;
}

header .title-sub {
    font-family: "ipx en","Product Sans",sans-serif !important;
}
永远喜欢……像素字体…………
友链界面修改
一直想做成类似stack主题那样的双栏友链页面,机缘巧合下参考了Sulu’s Blog的文章,首先在layouts\shortcodes里新建friend.html,复制以下代码
{{- if .IsNamedParams -}}
<a target="_blank" href={{ .Get "url" }} title={{ .Get "name" }} class="friendurl">
  <div class="frienddiv">
    <div class="frienddivleft">
      <img class="myfriend" src={{ .Get "logo" }} />
    </div>
    <div class="frienddivright">
      <span class="friendname">{{- .Get "name" -}}</span>
      <span class="friendinfo">{{- .Get "word" -}}</span>
    </div>
  </div>
</a>
{{- end }}
在自定义css里修改具体样式。
.friendurl {
    text-decoration: none !important;
    color: #3f4551 !important;
    box-shadow: none !important;
}

body[data-theme = "dark" ] .friendurl {
    text-decoration: none !important;
    color: silver !important;
    box-shadow: none !important;
}


.myfriend {
    width: 56px !important;
    height: 56px !important;
    border-radius: 50%!important;
    padding: 2px!important;
    margin-top: 20px !important;
    margin-left: 14px !important;
    background-color: #fff !important;
}

.frienddiv {
    overflow: auto !important;
    height: 110px !important;
    width: 49% !important;
    display: inline-block !important;
    border-radius: 10px !important;
    background: var(--color-codebg) !important;
    box-shadow: 0 6px 10px 0 #00000033;
}

body[data-theme = "dark" ] .frienddiv:hover {
    background: #272727 !important;
}

.frienddiv:hover {
    background: #f0f8ff !important;
}

.frienddivleft {
    width: 92px !important;
    float: left !important;
    margin-right: -5px !important;
}

.frienddivright {
    margin-top: 18px !important;
    margin-right: 18px !important;
}

.friendname {
    text-overflow: ellipsis !important;
    font-size: 110% !important;
    margin-bottom: 5px !important;
    color: var(--primary) !important;
}

.friendinfo::before {
    content: "";
    display: block;
    height: 5px; /* 调整空行的高度 */
}

.friendinfo {
    text-overflow: ellipsis !important;
    font-size: 80% !important;
    color: var(--primary) !important;
    line-height: 0!important;
}


@media screen and (max-width: 600px) {
    .friendinfo {
        display: none;
    }
    .frienddivleft {
        width: 74px!important;
        margin: auto!important;
    }
    .frienddivright {
        height: 100%!important;
        margin: auto!important;
        display: flex!important;
        align-items: center!important;
        justify-content: center!important;
    }
    .friendname {
        font-size: 16px!important;
    }
}
代码里的!important保证了css代码冲突时自定义代码的优先级,懒人必备。
使用的话只需在你的友链页里添加下面的短代码:
{<friend name="" url="" logo="" word="">}} (使用时在最前面加一个{
示例
![]()
![]()
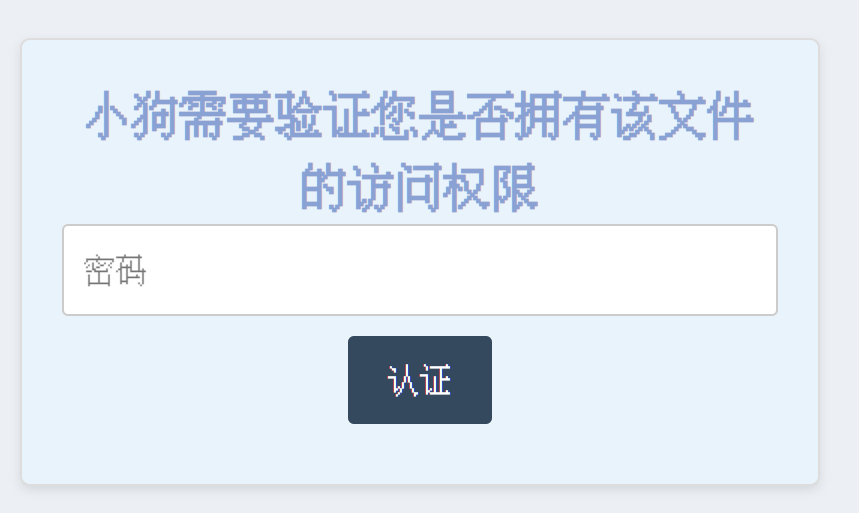
文章设置密码访问
示例页面:点我。
密码:test。
这个密码弹窗适配了主题的日间和夜间模式,最简单的查看方法是切换主题后刷新示例页面。我在示例里放了一张自家超可爱母肥的照片~
要实现这个效果也很简单,首先把下面代码复制到layouts\_default\single.html的<article>部分。注意:夜间样式的设置可能需要根据您的博客主题自行调整。
{{ if and .Params.password (ne .Params.password "") }}
    <style>
        /* 蒙层样式 */
        .overlay {
            position: fixed;
            top: 0;
            left: 0;
            width: 100%;
            height: 100%;
            background-color: #ECEFF4;
            display: flex;
            justify-content: center;
            align-items: center;
            z-index: 9999; /* 确保蒙层位于最顶层 */
        }

        /* 弹窗样式 */
        .custom-popup {
            width: 400px;
            padding: 20px;
            background-color: #e9f3fb;
            border: 1px solid #ddd;
            border-radius: 5px;
            box-shadow: 0px 2px 5px rgba(0, 0, 0, 0.1);
            text-align: center;
            font-family: ipx;
            color: #8aa2d3;
        }

        .custom-popup input[type="password"] {
            width: 100%;
            padding: 10px;
            margin-bottom: 10px;
            border: 1px solid #ccc;
            border-radius: 3px;
        }

        .custom-popup button {
            background-color: #34495e;
            color: #fff;
            border: none;
            border-radius: 3px;
            padding: 10px 20px;
            cursor: pointer;
            transition: background-color 0.3s ease;
        }

        .custom-popup button:hover {
        background-color: #ecf0f9; /* 鼠标悬停时的背景颜色 */
    }

        /* 密码错误提示样式 */
        .error-message {
            color: red;
            font-size: 14px;
            margin-top: 10px;
        }

        .password-hint {
            color: #3f4551;
            font-size: 14px;
            margin-top: 10px;
        }

        body[data-theme='dark'] .overlay {
            background-color: #2f3136; /* 黑夜模式下的背景颜色 */
        }

        body[data-theme='dark'] .custom-popup {
            background-color: #1e1e1e; /* 黑夜模式下的背景颜色 */
            color: #8aa2d3; /* 黑夜模式下的文字颜色 */
        }

        body[data-theme='dark'] .custom-popup button {
            background-color: #2c3e50; /* 黑夜模式下的按钮背景颜色 */
        }

        body[data-theme='dark'] .custom-popup button:hover {
            background-color: #34495e; /* 黑夜模式下按钮悬停时的背景颜色 */
        }

        body[data-theme='dark'] .password-hint {
            color: silver;
            font-size: 14px;
            margin-top: 10px;
        }
    </style>

    <div class="overlay">
        <div class="custom-popup">
            <h2>小狗需要验证您是否拥有该文件的访问权限</h2>
            {{ if .Params.password_hint }}
            <div class="password-hint">提示:{{ .Params.password_hint }}</div>
            {{ end }}
            <input type="password" id="password" placeholder="密码">
            <button id="submit-button">认证</button>
            <div class="error-message" id="error-message"></div> <!-- 密码错误提示 -->
        </div>
    </div>

    <script>
        var passwordInput = document.getElementById('password');
        var submitButton = document.getElementById('submit-button');
        var errorMessage = document.getElementById('error-message');

        passwordInput.addEventListener('keyup', function(event) {
            if (event.key === 'Enter') {
                submitButton.click(); // 模拟点击提交按钮
            }
        });

        submitButton.addEventListener('click', function() {
            var inputPassword = passwordInput.value;
            var expectedPassword = '{{ .Params.password }}';

            if (inputPassword === expectedPassword) {
                // 密码正确,移除蒙层并显示内容
                var overlay = document.querySelector('.overlay');
                overlay.style.display = 'none';
            } else {
                errorMessage.textContent = '认证失败!'; // 显示错误提示
            }
        });
    </script>
    {{ end }}
之后在需要设置密码的文章的Front Matter里添加密码信息。
+++
password = "test"
password_hint = "test"
+++

这是受密码保护的文章内容。
一个简单的密码输入页面就完成了,我顺便把弹窗的字体也改成了像素。
当然,这种前端设置的密码保护并不安全,很容易被查看和修改。但是这个博客本就不是用来存放隐私的,所以只要酷就够了!不是吗?
归档页面重写
2024.01.01更新:添加了年份折叠按钮
主题自带的归档页面不是我喜欢的样式,在ChatGPT的帮助下重写了一个。试了好多个方案,归档标题的年份都提取失败,只好采用最原始的方案,手动键入年份。在layouts\_default\archives.html里复制下面的代码。
{{ define "main" }}
<!-- 页面信息部分,例如当前标签和总存档页面数 -->
<div class="page-info">
  <span>{{ i18n "archivesTotalPages" }}{{ len (where .Site.RegularPages "Type" "in" .Site.Params.mainSections) }}</span>
</div>

<div class="empty-space"></div>

<!-- 按年份存档 -->
<div class="archive">
  <div class="archive-year">
    <h2>
      <button class="collapsible" onclick="toggleArchive('archive-2023')">2023</button>
    </h2>
    <ul id="archive-2023" class="archive-list">
      {{ range $index, $page := where .Site.RegularPages "Date.Year" 2023 }}
        <li class="archive-item">
          <span class="archive-date">{{ $page.Date.Format "01-02" }}</span> <!-- 仅显示月份和日 -->
          <a href="{{ $page.Permalink }}">{{ $page.Title }}</a>
        </li>
      {{ end }}
    </ul>
  </div>
</div>

<div class="empty-space"></div>

<div class="archive">
  <div class="archive-year">
    <h2>
      <button class="collapsible" onclick="toggleArchive('archive-2022')">2022</button>
    </h2>
    <ul id="archive-2022" class="archive-list">
      {{ range $index, $page := where .Site.RegularPages "Date.Year" 2022 }}
        <li class="archive-item">
          <span class="archive-date">{{ $page.Date.Format "01-02" }}</span> <!-- 仅显示月份和日 -->
          <a href="{{ $page.Permalink }}">{{ $page.Title }}</a>
        </li>
      {{ end }}
    </ul>
  </div>
</div>

<style>
  /* 隐藏初始状态下的列表 */
  .archive-list {
    display: none;
  }

  .collapsible {
    background-color: #f0f8ff;
    color: #8aa2d3;
    padding: 10px;
    border: 1px solid #8aa2d3;
    border-radius: 5px;
    outline: none;
  }

  .collapsible::before {
    content: '#';
    color: #e6cfe6;
  }

  /* 按钮悬停时的样式 */
  .collapsible:hover {
    background-color: #e9f3fb;
  }
</style>

<script>
  document.addEventListener('DOMContentLoaded', function () {
    // 在页面加载完成后将列表隐藏
    var archiveList = document.getElementById('archive-2023');
    archiveList.style.display = 'none';
  });

  function toggleArchive(archiveId) {
    var archiveList = document.getElementById(archiveId);
    archiveList.style.display = (archiveList.style.display === 'none' || archiveList.style.display === '') ? 'block' : 'none';
  }
</script>

<div class="empty-space"></div>

<!-- custom smart pagination -->
{{- partial "pagination.html" (dict "context" . "pagi" .Paginator) -}}

{{ end }}
之后在自定义css里调整一下格式,顺便修改了博客标题的字体大小。
/* Style for empty space */
.empty-space {
    height: 20px; /* Adjust the height as needed */
  }

.post-title {
    font-size: 1.9rem !important;
}
About和Link页面去掉日期显示
在layouts\_default\single.html里修改,只要在文章里没有检测到日期数据,就不会在文章开头显示日期,字数和tag。
修改这个完全是因为懒得再写这两个页面的html文件,Markdown最香了!
<!-- post meta -->
<h2 class="post-item post-title">
    <a href="{{ .Permalink }}">{{ .Title }}</a>
</h2>
{{ if .Date }}
   <div class="post-item post-meta">
     {{ partial "post-meta.html" . }}
   </div>
{{ end }}
最后
顺手修改了主题i18n下的系统语言文件,现在您可以在文章底部看到全新的转载许可公告。
当然,我修改的系统文字不止这一处,剩下的就靠缘分来发掘啦!XD